I've been working hard on some things for my classroom-so picture overload warning ahead! :)
For my first made-it this week....
I customized my Target sign!
Since I like to set the rules with the kiddos, I wasn't a big fan of the follow the rules heading-but I liked the rest of it!
I thought I could make it better-and I did!
The first thing I did was to gather all of my tools.
 |
| Not pictured: The paint pens I used |
Then I cut all the string off, so I could work with it easier.
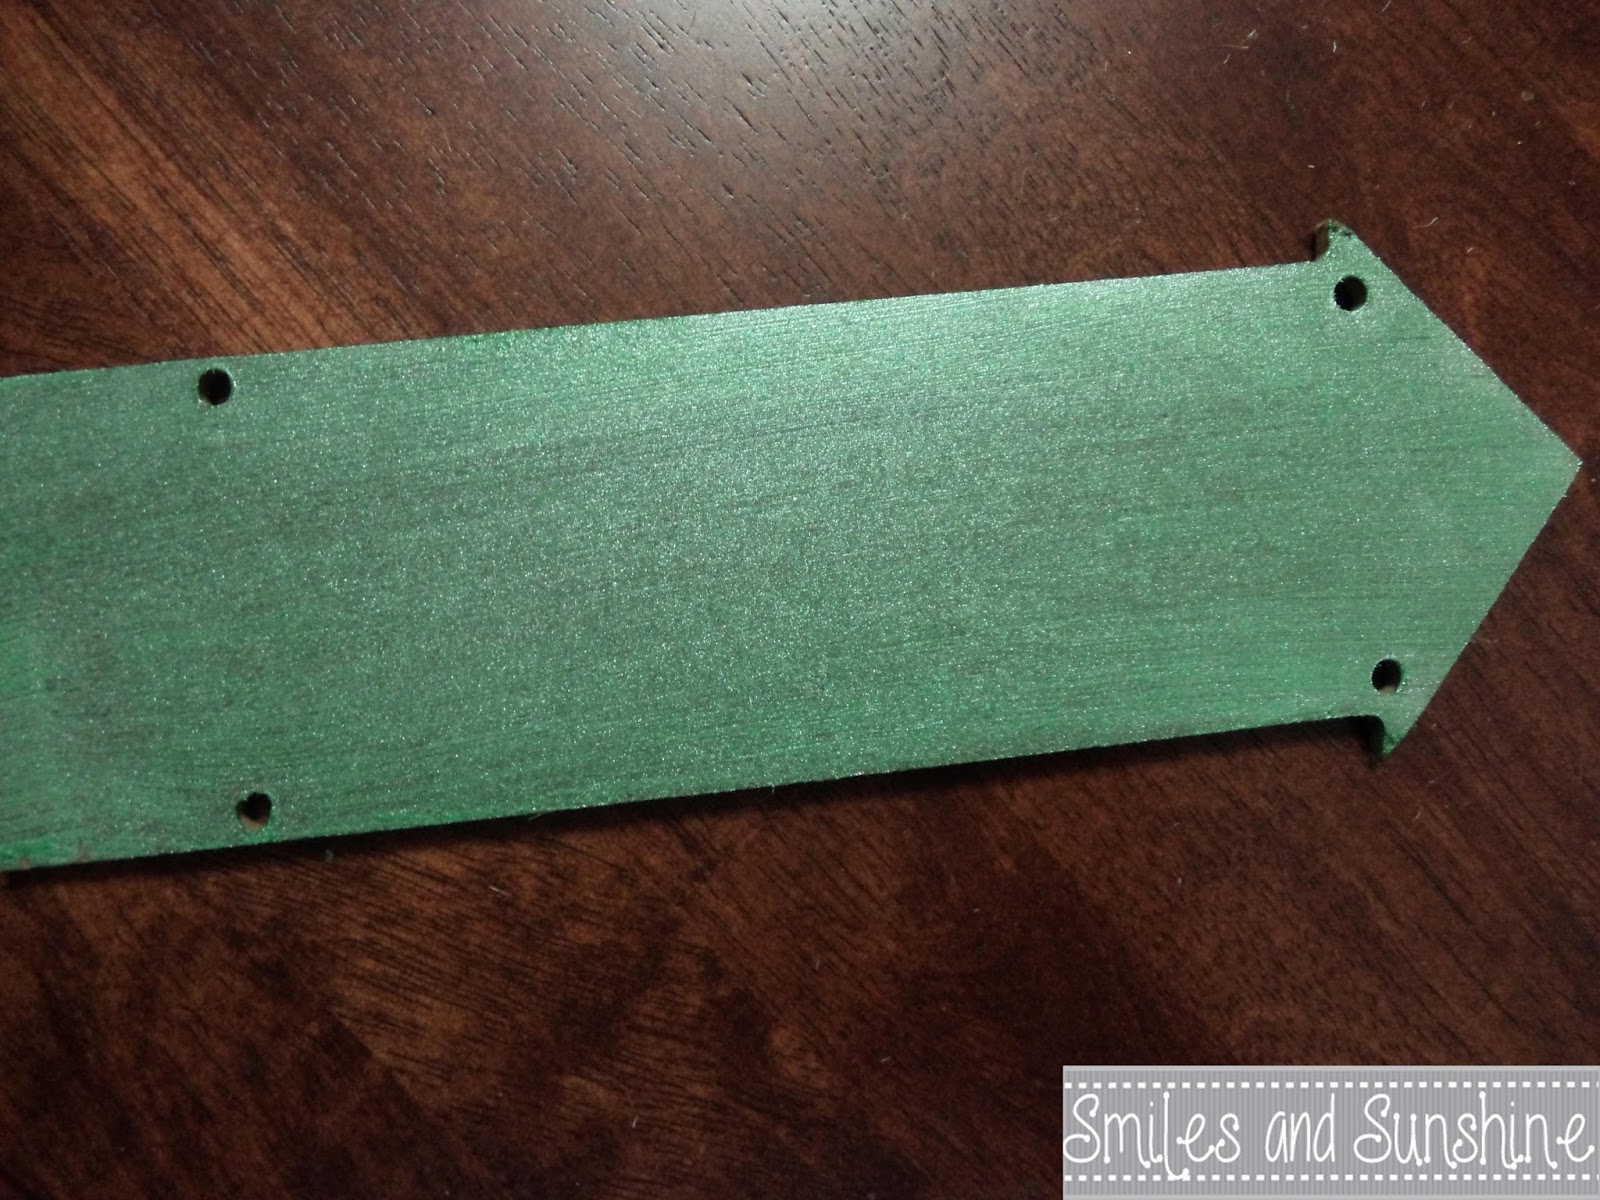
and flipped over the arrow
and did a coat (or three!) of paint!
 |
| The paint is Martha Stewart's Craft Paint Pearl in Putting Green |
Since I was changing what the arrow said, I also had to turn your into our for it to make more sense. I painted over that as well, and added an 's' with my paint pen.
I was originally only going to do a few of the sayings in silver-but then I remember I had other colors {from years and years ago}, and thought it would look much cooler with other colors!
I did do 2-3 coats with the paint pens.
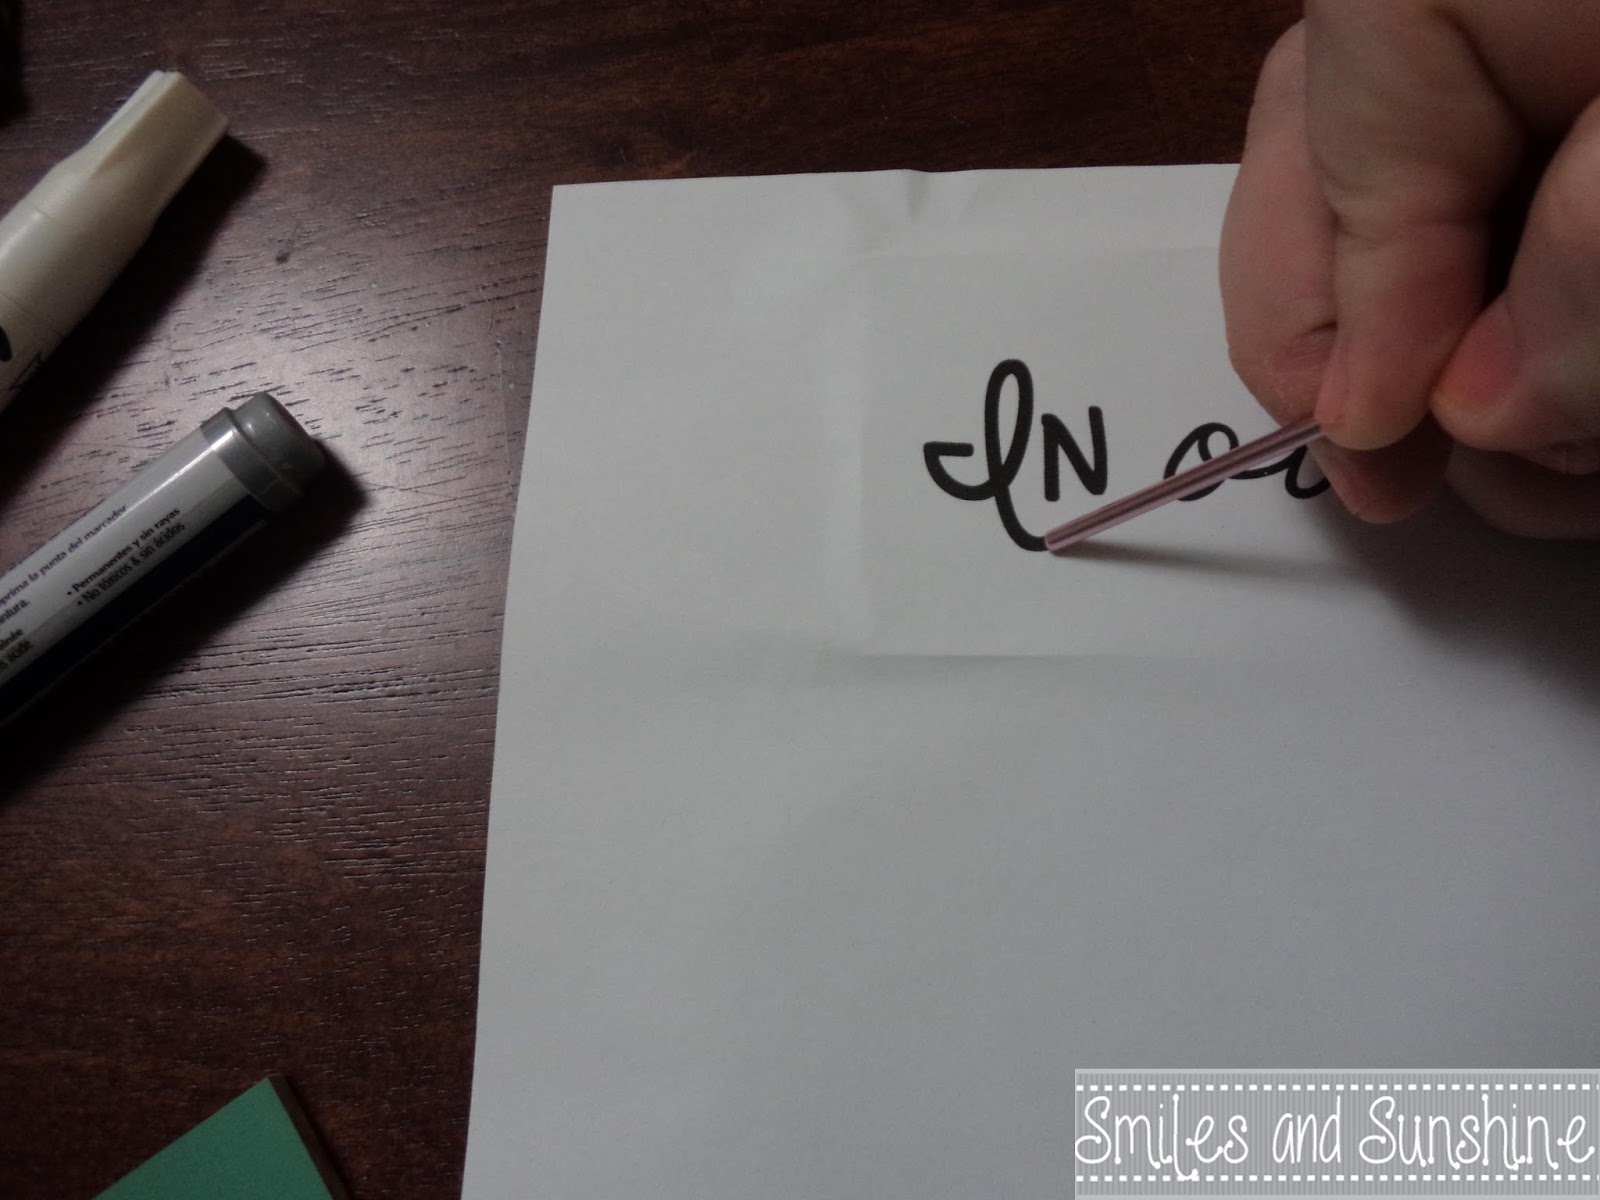
While the paint was drying, I went to my computer to type up what I wanted to put on the arrow-and brought it over so I could make sure that it would fit!
Now, I don't have a Silhouette or a Cameo or anything fancy like that-so I went old school.
Using a pencil!
I turned the paper over and rubbed my pencil of the back of the letters.
Then I flipped in over and 'centered' in on the arrow.
Then I took one of my smaller crochet hooks, flipped it over, and started 'tracing' the letters.
Since the back was covered in graphite, it left a faint impression-just enough for me to cover with my paint pen!
I slowly started tracing it with my paint pen, not wanting any paint explosions
But you know, accidents happen
Fortunately, it was an easy fix-just paint over it!
All better!
Once everything was dry, I started putting it back together.
I changed the top a little-I wanted a little bow on the top!
The best part-the follow the classroom rules is still there on the other side!
If I ever want to change it, I just have to cut the twine and fix it.
I love how it turned it!
Total cost for the project-$3-the cost of the sign-I had everything else!
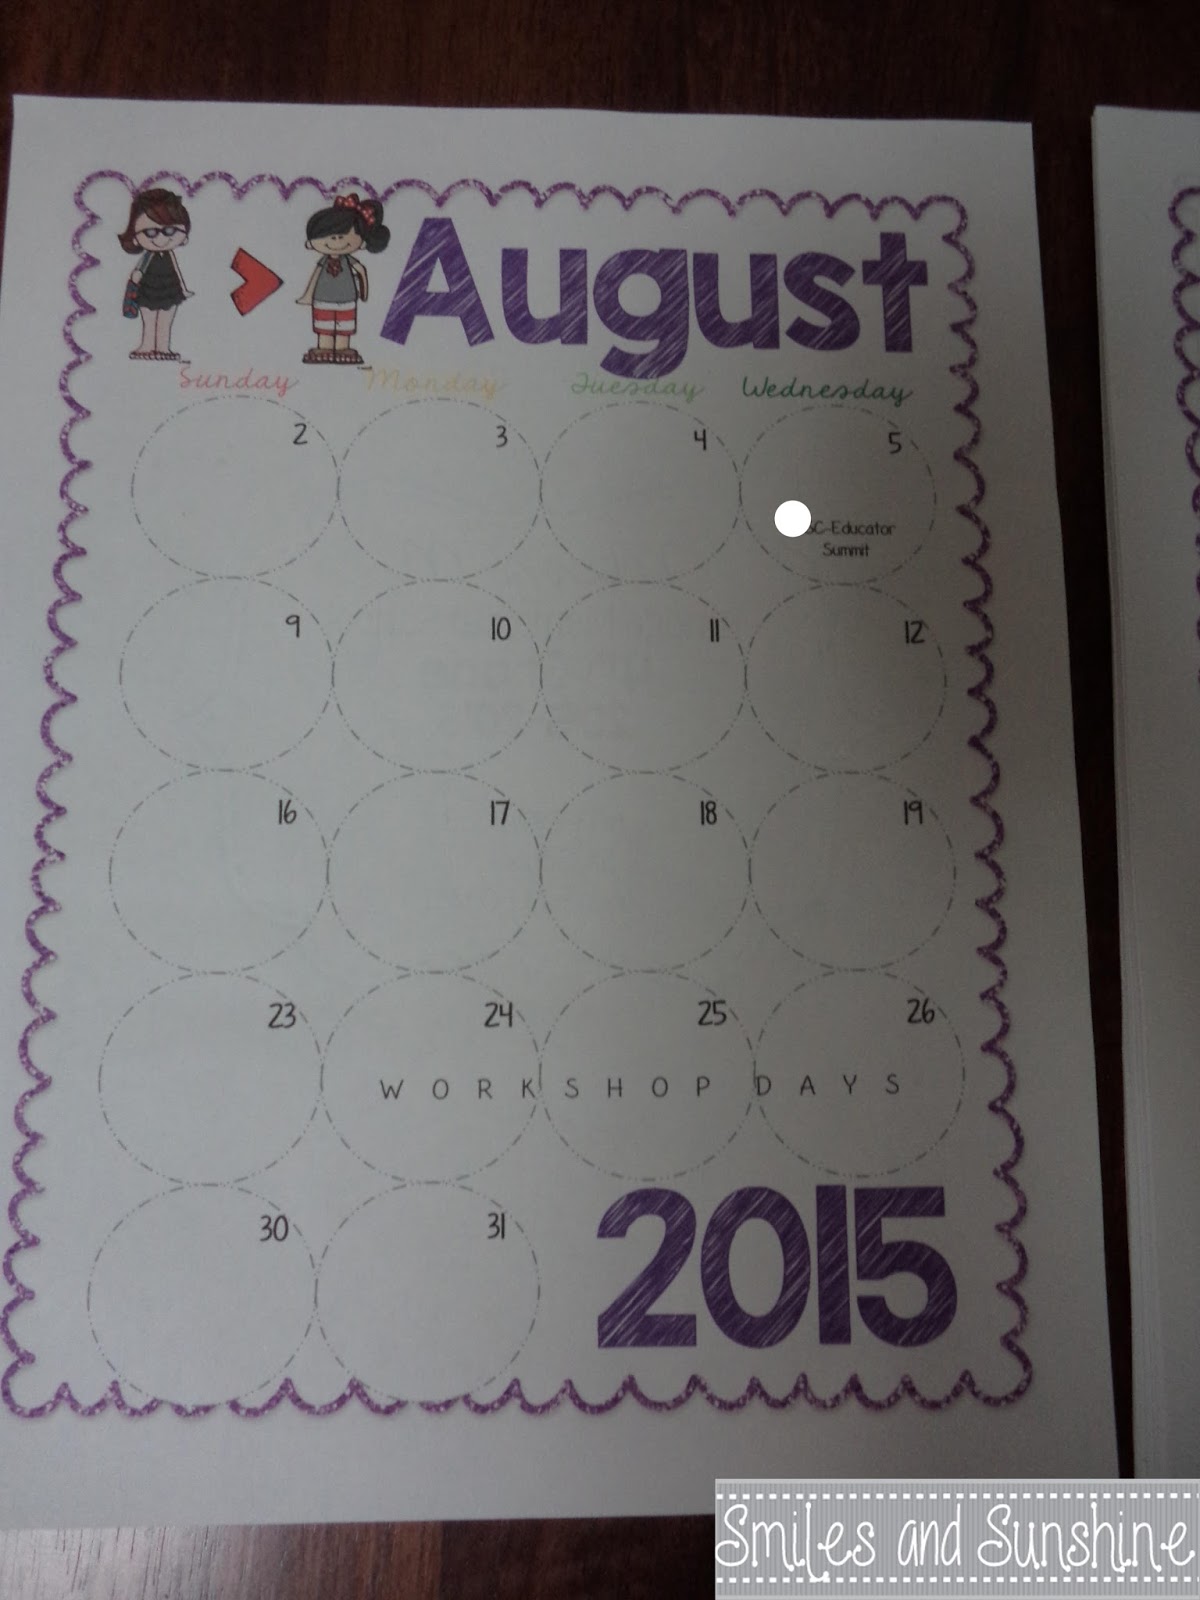
I also completed my lesson planner for the next year! I had some hours to fill while waiting for my car to be fixed...
I changed how I did the calendars this year-which made it take longer!
Instead of doing a table and splitting the cells-I decided to do each date in circles!

It looks so cute! Since the days were so wonky with the dates as I had originally had them (I had a lot more Sunday, Monday, Tuesday, Wednesdays than I did Thursday, Friday, Saturdays), it was really throwing off the formatting.
Since I didn't really fill in the boxes the previous two years, I thought I could go with something smaller.
It also allowed me to add some extra clipart to each month-all fitting in with that month's theme of course!
I kept the format for the rest of the plans the same (I like to handwrite mine, and since things can change, I don't like having it typed out-I'm anal that way! ;)
I also added in the no school and PD days-helps me remember them {although, really, who forgets those days?!}
I've also started setting up my planning guide for the year. It will include curriculum maps, standards and helpful things for planning :)
 |
| Covers-I need to laminate them! |
I also did two paintings! One was at the studio I normally go to, and the other was a surprise! My friend had tickets to do a paint nite with her daughter (the traveling one that goes to different restaurants), but her daughter had something to do at the last minute, so I got to go instead!
 |
| Studio Painting |
 |
| Paint Nite Painting |
I had fun with my friend (and we went out to dinner after), but I definitely prefer the studio painting experience-you get more colors and better instruction, as well as help if you need it.
Have a wonderful week!
Smiles and Sunshine,
Kaitlyn


Wow...I love how you changed the sign. How creative!
ReplyDeleteYour reimagined sign turned out fabulously! You were extremely busy creating for school, but I love that you balanced it with painting time for you. It's so important to try to find balance in life!
ReplyDeleteTonya
Storybook Endings in Second
Love the way you made the sign your own. Awesome. Your planner looks fabulous, as well. :)
ReplyDeleteWOW! You have been super busy. I love your creations. You are a great artist for sure - and very patient. I don't think I'd be able to stick with everything you did for the top of your sign. All looks great!!
ReplyDeleteJanie
Are We There Yet?
Love your sign. Someone actually got me the same one as a gift. Can I send you mine and you can update mine too? Lol! It turned out great!
ReplyDeleteAlison
Rockin' and Lovin' Learnin'
Thanks for all the directions for your sign. So cute! It looks like it took quite a bit of work but turned out great!
ReplyDeletePam
PJ Jots
Your sign looks great-- I love the updates you did to make it more personal! I just went to my first date night-- my painting doesn't look as great as yours though. There is a traveling night that goes to different restaurants? That sounds so much fun!
ReplyDeleteMy Bright Blue House